


**The Comprehensive Guide to Siding Installation: What You Need to Know** When it comes to enhancing the exterior of your home, siding installation is a significant undertaking that can dramatically improve both aesthetics and functionality. However, before diving into the project, it’s essential to understand the various stages involved in the process. This guide will walk you through each critical phase, ensuring you are well-prepared for a successful siding installation.
Key Takeaways
- Conduct a thorough pre-installation assessment to ensure proper planning and material needs.
- Choose siding materials based on durability, aesthetics, and climate suitability.
- Prepare the surface carefully by removing old siding and addressing any underlying issues.
- Schedule installation considering weather conditions to avoid delays and damage.
- Follow safety protocols, perform quality inspections, and provide maintenance guidance after completion.
A comprehensive pre-installation assessment must be completed before beginning any siding installation work. This evaluation examines the existing condition of the home’s exterior and identifies specific requirements for the siding project. Professional contractors perform detailed inspections to detect damage, moisture infiltration, or structural deficiencies that require remediation prior to siding installation.
The assessment serves to identify potential complications and inform the selection of appropriate siding materials for the specific application. The assessment phase includes precise measurement of all exterior surfaces to calculate accurate material quantities. Accurate measurements prevent material shortages or excess ordering, which can result in project delays and cost overruns.
During this evaluation, property owners should communicate their design specifications and budget parameters to the contractor to establish clear project expectations and scope.
Siding Material Selection
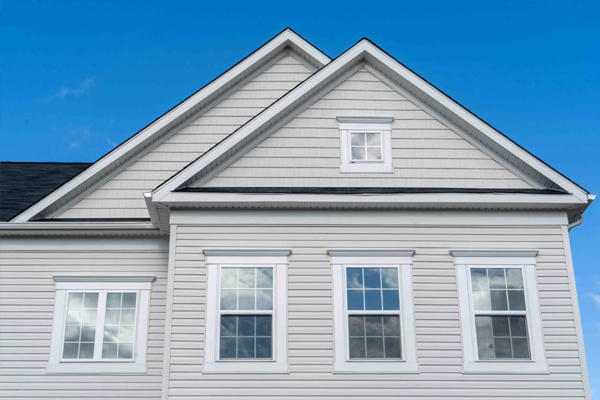
Choosing the right siding material is one of the most critical decisions in the installation process. There are various options available, each with its unique benefits and drawbacks. Common materials include vinyl, wood, fiber cement, and metal.
Vinyl siding is popular due to its affordability and low maintenance requirements, while wood offers a classic aesthetic but may require more upkeep over time. When selecting siding materials, consider factors such as durability, insulation properties, and climate suitability. For instance, fiber cement is known for its resilience against harsh weather conditions, making it an excellent choice for areas prone to extreme temperatures.
Homeowners should also take into account the desired appearance and color palette to ensure that the new siding complements the overall style of their home.
Siding Removal and Preparation

Once the material has been selected, the next step is to prepare the existing structure for installation. This often involves removing old siding, which can be a labor-intensive process. The contractor will carefully strip away the old material while inspecting the underlying structure for any signs of damage or rot that may need repair before new siding can be installed.
Preparation also includes cleaning the surface and making necessary repairs to ensure a solid foundation for the new siding. This may involve replacing damaged sheathing or addressing any moisture issues that could compromise the integrity of the new installation. Proper preparation is essential for achieving a long-lasting and visually appealing result.
Installation Timeline and Schedule
Establishing a clear timeline and schedule for the installation process is vital for both contractors and homeowners. A well-defined schedule helps manage expectations and ensures that everyone involved is on the same page regarding project milestones. Typically, siding installation can take anywhere from a few days to several weeks, depending on the size of the home and the complexity of the project.
Factors such as material availability or unexpected weather conditions can impact timelines. By maintaining clear communication, homeowners can better prepare for any adjustments that may arise during the installation process.
Weather Considerations
| Stage | Duration | Activities | What to Expect | Common Metrics |
|---|---|---|---|---|
| Preparation | 1-2 days | Remove old siding, inspect walls, repair damages | Noise and debris; possible minor disruption | Area cleared, old siding removed 100% |
| Installation of Underlayment | Half day | Apply moisture barrier or house wrap | Minimal noise; ensures moisture protection | Coverage: 100% of exterior walls |
| Aluminum Siding Installation | 2-4 days | Cut and fit aluminum panels, secure to walls | Moderate noise; workers on ladders/scaffolding | Panels installed per square foot, fasteners used |
| Trimming and Finishing | 1 day | Install corner trims, window/door trims, caulking | Detail work; minor noise | Trim pieces installed, caulking lines continuous |
| Cleanup | Half day | Remove debris, clean work area | Worksite restored to normal | Debris removed 100%, site inspected |
| Total Project Time | 4-7 days | All stages combined | Temporary disruption; final durable siding installed | Square footage covered, installation quality checked |
Weather plays a significant role in siding installation, as extreme conditions can hinder progress and affect the quality of work.
Rain or high humidity can also pose challenges, particularly for materials like wood or fiber cement that may absorb moisture.
Homeowners should keep an eye on weather forecasts leading up to and during the installation process. If inclement weather is expected, it may be necessary to adjust the schedule accordingly to avoid compromising the integrity of the installation. A reputable contractor will have contingency plans in place to address weather-related challenges effectively.
Noise and Disruption

Siding installation is not without its disruptions; it can be a noisy process that may affect daily life in your home. Power tools, hammering, and other construction noises are typical during this phase, which can be particularly challenging for families with young children or pets. It’s essential to prepare for this disruption by discussing it with your contractor beforehand.
To minimize inconvenience, homeowners might consider scheduling work during times when they are less likely to be home or when children are at school. Additionally, informing neighbors about the upcoming project can help manage expectations regarding noise levels and potential disruptions in the surrounding area.
Safety Precautions
Safety should always be a top priority during any construction project, including siding installation. Contractors should adhere to strict safety protocols to protect both workers and homeowners throughout the process. This includes using appropriate personal protective equipment (PPE), such as hard hats, gloves, and safety goggles.
Moreover, homeowners should ensure that their property is safe for workers by clearing pathways and securing pets during installation. It’s also wise to discuss safety measures with your contractor before work begins to ensure everyone is aware of potential hazards and how they will be addressed.
Quality Control and Inspection
Once installation is underway, quality control becomes paramount. Regular inspections throughout the process help ensure that work meets industry standards and adheres to manufacturer specifications. Homeowners should feel empowered to ask questions and request updates on progress at any stage of the installation.
After completion of the siding installation, a final inspection should be conducted to assess workmanship and identify any areas that may require touch-ups or corrections. This step is crucial for ensuring that the finished product not only looks great but also performs effectively over time.
Cleanup and Waste Disposal
After installation is complete, cleanup is an essential part of the process that should not be overlooked. A professional contractor will typically handle waste disposal as part of their service, ensuring that all debris from old siding and excess materials are removed from your property efficiently. Homeowners should confirm with their contractor about how waste will be managed throughout the project.
Proper disposal not only keeps your property tidy but also contributes to environmental sustainability by ensuring materials are recycled or disposed of responsibly.
Final Walkthrough and Inspection
The final walkthrough is an important step in the siding installation process where homeowners have an opportunity to review the completed work with their contractor. This meeting allows homeowners to ask questions about maintenance or care instructions while ensuring that all aspects of the project meet their expectations. During this walkthrough, it’s essential to check for any imperfections or areas that may need further attention before considering the project complete.
A thorough inspection at this stage helps guarantee satisfaction with the final product and provides peace of mind regarding its longevity.
Maintenance and Care Instructions
Once your new siding is installed, understanding how to maintain it properly is crucial for preserving its appearance and functionality over time. Different materials require varying levels of care; for instance, vinyl siding typically requires minimal maintenance beyond occasional cleaning with soap and water. Homeowners should consult their contractor for specific maintenance guidelines tailored to their chosen siding material.
Regular inspections can help identify any issues early on, allowing for timely repairs that prevent more significant problems down the line. By following these care instructions diligently, homeowners can enjoy their new siding for many years to come. In conclusion, embarking on a siding installation project requires careful planning and consideration at every stage—from pre-installation assessments to ongoing maintenance after completion.
By understanding each phase of this process and working closely with a qualified contractor, homeowners can ensure a successful outcome that enhances both their home’s beauty and value. If you’re ready to transform your home’s exterior with new siding, contact a professional today to get started!
When considering aluminum siding installation, it’s essential to understand not only the process but also the benefits it brings to your home. For instance, you might find it helpful to read about how aluminum siding can enhance your home’s curb appeal and provide robust protection against the elements in this article: Siding Solutions: Boosting Your Home’s Curb Appeal and Defense. This resource offers valuable insights that complement the information on what to expect during the installation process.
Get Free Estimate (647) 560-9038
FAQs
What is aluminum siding?
Aluminum siding is a type of exterior cladding made from aluminum panels or sheets. It is used to protect and decorate the exterior walls of buildings and is known for being lightweight, durable, and resistant to rust and corrosion.
How long does aluminum siding installation typically take?
The installation time varies depending on the size of the house and the complexity of the job, but generally, aluminum siding installation can take anywhere from a few days to a week.
What preparation is needed before aluminum siding installation?
Before installation, the existing siding or exterior surface may need to be removed or repaired. The walls should be clean, dry, and structurally sound. Additionally, any necessary insulation or moisture barriers may be installed prior to the siding.
Will aluminum siding installation create a lot of noise or mess?
Installation can generate some noise from cutting and fastening the panels, and there may be debris such as old siding materials or packaging. Professional installers typically manage cleanup to minimize mess.
Can aluminum siding be installed over existing siding?
In some cases, aluminum siding can be installed over existing siding if the surface is even and in good condition. However, it is often recommended to remove old siding to ensure proper installation and avoid moisture problems.
Is aluminum siding maintenance-intensive?
Aluminum siding is relatively low maintenance. It may require occasional cleaning to remove dirt and debris, and periodic inspections to check for dents or damage. Unlike wood siding, it does not need painting frequently.
What are the benefits of choosing aluminum siding?
Aluminum siding is durable, resistant to fire and pests, lightweight, and does not rust. It is also recyclable and can be painted in various colors, making it a versatile option for exterior cladding.
Are there any weather considerations during installation?
Installation is best done in dry weather conditions to ensure proper adhesion and to avoid moisture being trapped behind the siding. Extreme temperatures can also affect the installation process.
Will aluminum siding improve home insulation?
Aluminum siding itself provides minimal insulation, but when installed with an insulating layer or foam backing, it can contribute to improved energy efficiency.
How much does aluminum siding installation typically cost?
Costs vary based on the size of the home, the quality of materials, and labor rates. On average, aluminum siding installation can range from $5 to $12 per square foot, including materials and labor.